Building an Ice Cube Fermentation Cooler |
|
 |
 |
So what’s so nice about a fermentation cooler?
1) The cooler is insulated so it should keep temps down without any problems. These coolers have been used effectively for both ales and lagers.
2) No more carrying around heavy carboys because the 60qt Igloo Cooler (and MaxCold cooler) is on wheels. Just put the empty carboy into the cooler prior to filling it with your cooled wort, shut the lid and wheel it wherever it needs to be stored for fermentation.
3) There is a spigot at the bottom of the cooler, so if you need to fill the cooler with cold water to cool the temps down, it is easy to drain (i.e., no more picking heavy swamp buckets to dump).
How do you make a fermentation cooler?
The fermentation cooler is very easy to build…even the non do-it-yourselfer can handle this simple project. To build a fermentation cooler you will need the following materials/tools:
Materials
- An Igloo Ice Cube Cooler: Most stores carry the regular 60qt cooler for around $20-25, but there is also a MaxCold Ice Cube Igloo Cooler that has a dome lid that generally sells for about $35. Both coolers will keep fermentation temperatures under control, the added advantage of the MaxCold cooler is that the lid only needs slight modification (but it is slightly more expensive).
- Some cardboard for the template hole (any cardboard will do, just make sure you get a piece that is as big as the carboy’s shoulder that you intend to ferment in).
- Empty soda bottles (i.e., can be 2 liter or smaller), amount is dependent upon how cold you need the cooler temps to drop to.
- A thermometer (optional).
Tools
- Dremel with cheap cut-off discs or some sort of tool for cutting through plastic (i.e., you may be able use a utility knife instead - just be careful).
- Pen/pencil
Please Note: Some homebrewers have opted NOT to cut the cooler lid and instead made their own lids out of Styrofoam.
How to get started (10 easy steps)?
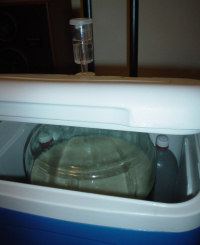
Step 1: Remove the cooler lid (should just “pop” off) and place the carboy down into the cooler. (Please note: The reason for this is to check to see how the carboy sits in the bottom of the cooler - in order to figure out where the hole needs to be cut in the cooler lid. If the carboy is a little off center, you will need to keep this in mind when deciding where to cut the hole(s) in the lid, in step 5).
|
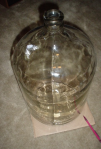
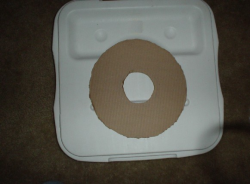
Step 2: Remove the carboy from the cooler and place it on top of the piece of cardboard. Trace around the bottom of the carboy to get an idea of the size of the larger hole (see below).
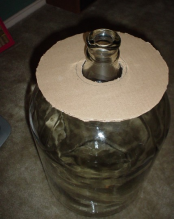 |
Step 3: Draw out a “center” hole in the center of this lager circle. Make sure that this center hole is only slightly bigger than the size of the carboy’s neck (can use a pint glass - see below). 
 |
Step 6: Take your dremel (or other cutting tool) and careful cut out the larger hole.
Step 7: After you have cut out the larger hole, trace the smaller hole at the center of the larger hole and cut it out.
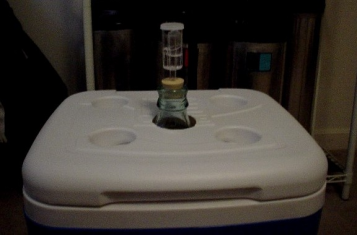
Step 8: Place the lid back onto the cooler, put the carboy into the cooler and check to see if this first round of cuts works. The cooler lid should be able to close over the carboy (Please note: You might need to lean the carboy slightly to get the neck of the carboy through the smaller hole).
Step 9: If your first round of cuts did not work, trim the holes until they do!
Step 10: Depending on the size of your cooler/carboy, you may also need to use a hammer to bend (i.e., bash) in the hard plastic cupholders that are attached to the lid. Add a thermometer to the inside of the cooler (optional).
