Bar
|
|
After purchasing our first house, one of the first house projects that I wanted to work on was to build a bar in the basement. Not quite share where to start, I starting looking around online to see what other bars look like and to see if I could come up with a design that worked best for the space that I had and the type of bar that I wanted. I decided that an L-shaped bar fit the space and so I just jumped head in and started building it, with no final outcome in mind. I wish I could say that I had detailed plans of my bar prior to the build, because I've had a number of people ask me for specific plans. Unfortunately, the bar was built with just an idea in my head and most decisions were made along the way. Luckily, I took a lot of pictures, most of which I've included a slideshow of the build below.
Main Bar
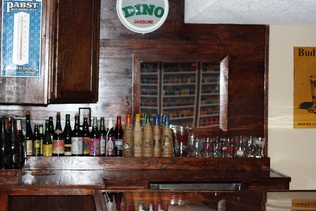
The main bar measures roughly 8.5 feet (long side of bar) by 6.5 feet (kegerator side). The kegerator side of the bar raises up on hinges, so that I can get beer kegs in and out with ease (i.e., there is a 7.0 cubic chest freezer inside this portion). The bar is made from a handful of different types of wood including mostly oak, pine, and even some maple. The back of the main bar is divided into three sections that includes shelves for glassware and a 3 tier wine rack.
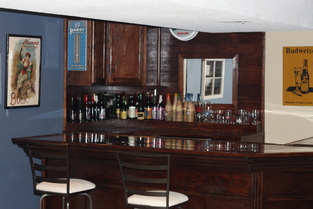
The draft tower was won off of an online auction site and needed A LOT of care before it was mounted onto the bar top. The back of the tower reads 'Enjoy Draught Beer' and has a light built into it. The tower originally had space for only 3 taps, but when I rebuilt it, I noticed that it had room for a 4th tap.
|

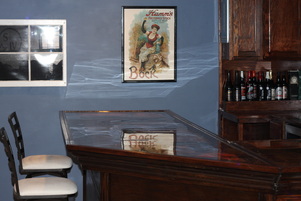
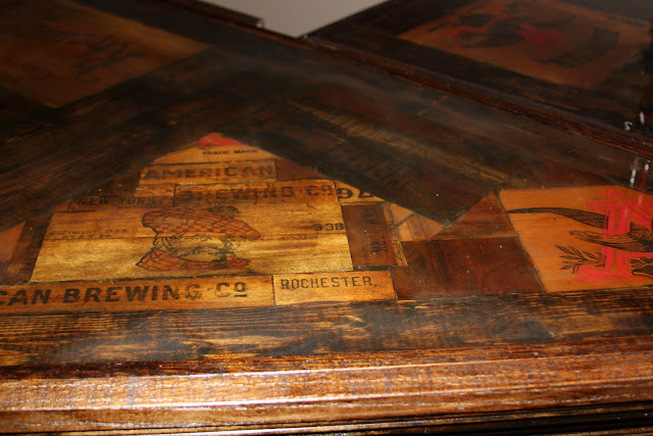
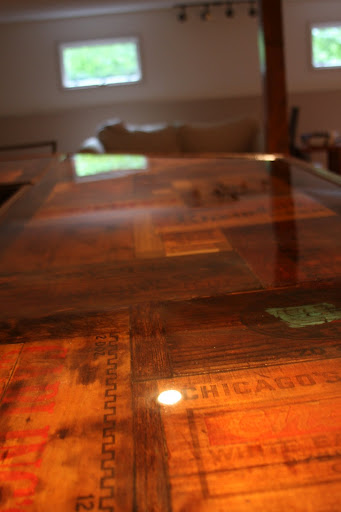
The main bar top area is 3 feet wide and from floor to bar top it is roughly 42 inches - this is important because of the height of the stools. The bar top is made up of old/vintage beer crates that have been pieced together like one big puzzle (see applying the bar top section below). Although an expensive bar top, I liked the idea of having something unique and it has turned into a great conversation piece. A majority of the crates were bought at antique fairs, flea markets, and of course through online auctions. Some of these beer crates are considered collectors items and were tough to cut up.
|
Applying the Bar Top
I often get asked about the epoxy that covers the bar top(s). I won't lie to you, putting the epoxy on was not an easy task particularly with using old wood beer crates (signs/labels) as the surface. The epoxy I used was called Kleer Koat Table Top Epoxy (by US composites) and it comes in two different containers (hardener + epoxy).
First, you have to measure out the two materials, so that there is a 1:1 ratio between hardener and epoxy. If you measure incorrectly, you could end up with some sticky spots when the material dries. After your measurements are completed, you need to mix the two materials together really well, and by doing so... you create millions of tiny bubbles in the mix. Then, you pour it out onto the surface and have to quickly spread it out to cover the area. Depending on the size of the table/bar, this can be tricky and even though the epoxy does end up leveling itself out, it dries quickly so you have to work VERY fast. A torch can be used after the surface has leveled (it helps in bursting the bubbles that have formed under the surface). The surface eventually dries completely solid, almost like glass.
|

|
Slideshow of the Bar Build
Pez Wall
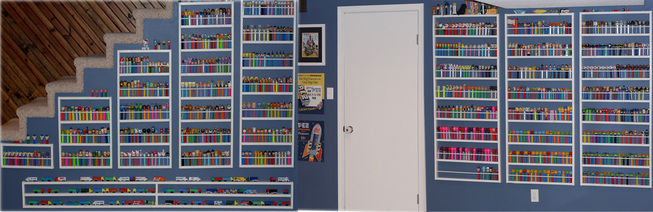
I collect beer, but my wife collects Pez (1000+), which are displayed on the opposite wall of the basement...